
How to Prepare Your Book File for Printing
How to Prepare Your Book File for Printing
You've finished writing. You've done the layout. Now you're ready to print — but is your file actually ready?
This is the question most first-time authors and publishers miss. Sending a file that looks perfect on screen can still result in printed books with cut-off text, blurry images, or shifted margins. At VST Press, we review every file before we print it. This guide shares exactly what we check — so you can fix it before you send it to us.
1. Export as PDF, Not Word
The single most important step.
Microsoft Word files may show the content placement differently on different computers. Fonts shift. Margins change. What looks correct on your screen may look completely different on ours.
Always export your final file as a PDF.
When exporting from Word, InDesign, or any layout software, choose:
- PDF/X-1a or PDF/X-4 format (preferred for print)
- Or simply "High Quality Print" if you don't see those options
This locks your layout exactly as you designed it.
2. Set the Correct Page Size
This sounds obvious, but it's one of the most common mistakes we see.
Your PDF page size must match the final trimmed size of your book — not A4, unless your book is actually A4.
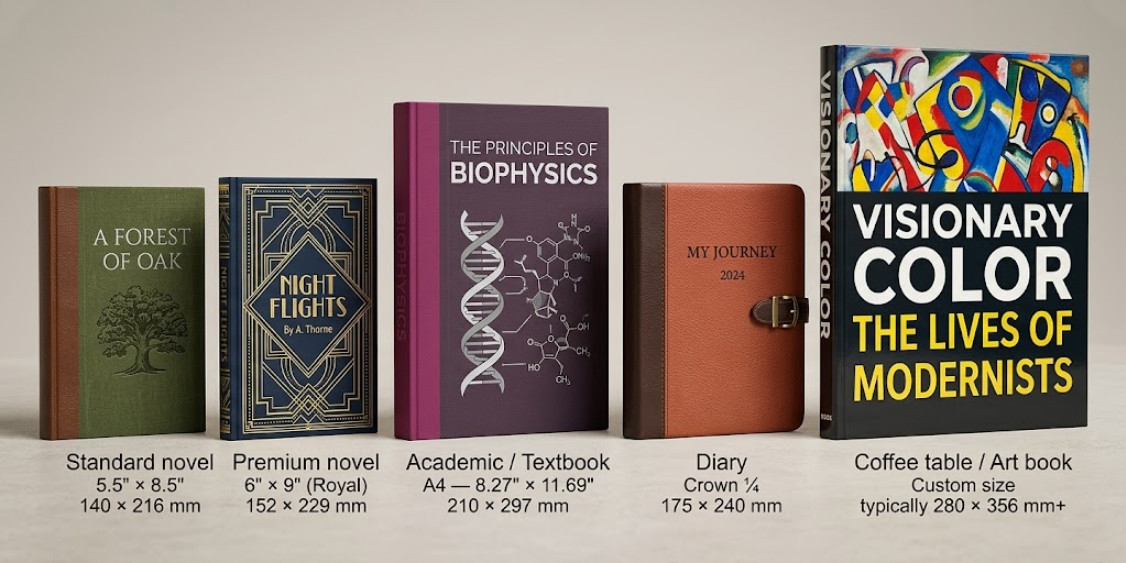
Common book sizes we print:
| Book Type | Size |
|---|---|
| Standard novel | 5.5" x 8.5" (140 × 215 mm) |
| Premium novel | 6" x 9" (Royal) |
| Academic / Text Book | A4 (210 x 297 mm) |
| Diary | Crown 1/4 (175 x 240 mm) |
| Coffee table / art book | Custom |
 If you designed your pages at A4 but want an A5 book, do not scale in the PDF export — go back and redesign at the correct size. Scaling distorts proportions and reduces image quality.
3. Add Bleed (3mm on All Sides)
Bleed is the most misunderstood concept in print preparation.
When a book is printed, the pages are printed on larger sheets and then trimmed to the final size. Cutting is never perfectly precise — it can shift by 1–2mm. Bleed is the extra area beyond your page edge that accounts for this shift.
Rule: Any element that touches the edge of your page must extend 3mm beyond the edge.
This includes:
- Background colours
- Full-page images
- Decorative borders touching the edge
If you don't add bleed and the cut shifts slightly, you'll see a thin white strip along the edge of your page. It looks unprofessional and cannot be fixed after printing.

Safe zone: Keep all important content (text, logos, key images) at least 5mm away from the page edge. This is the opposite of bleed — it ensures nothing important gets accidentally trimmed.
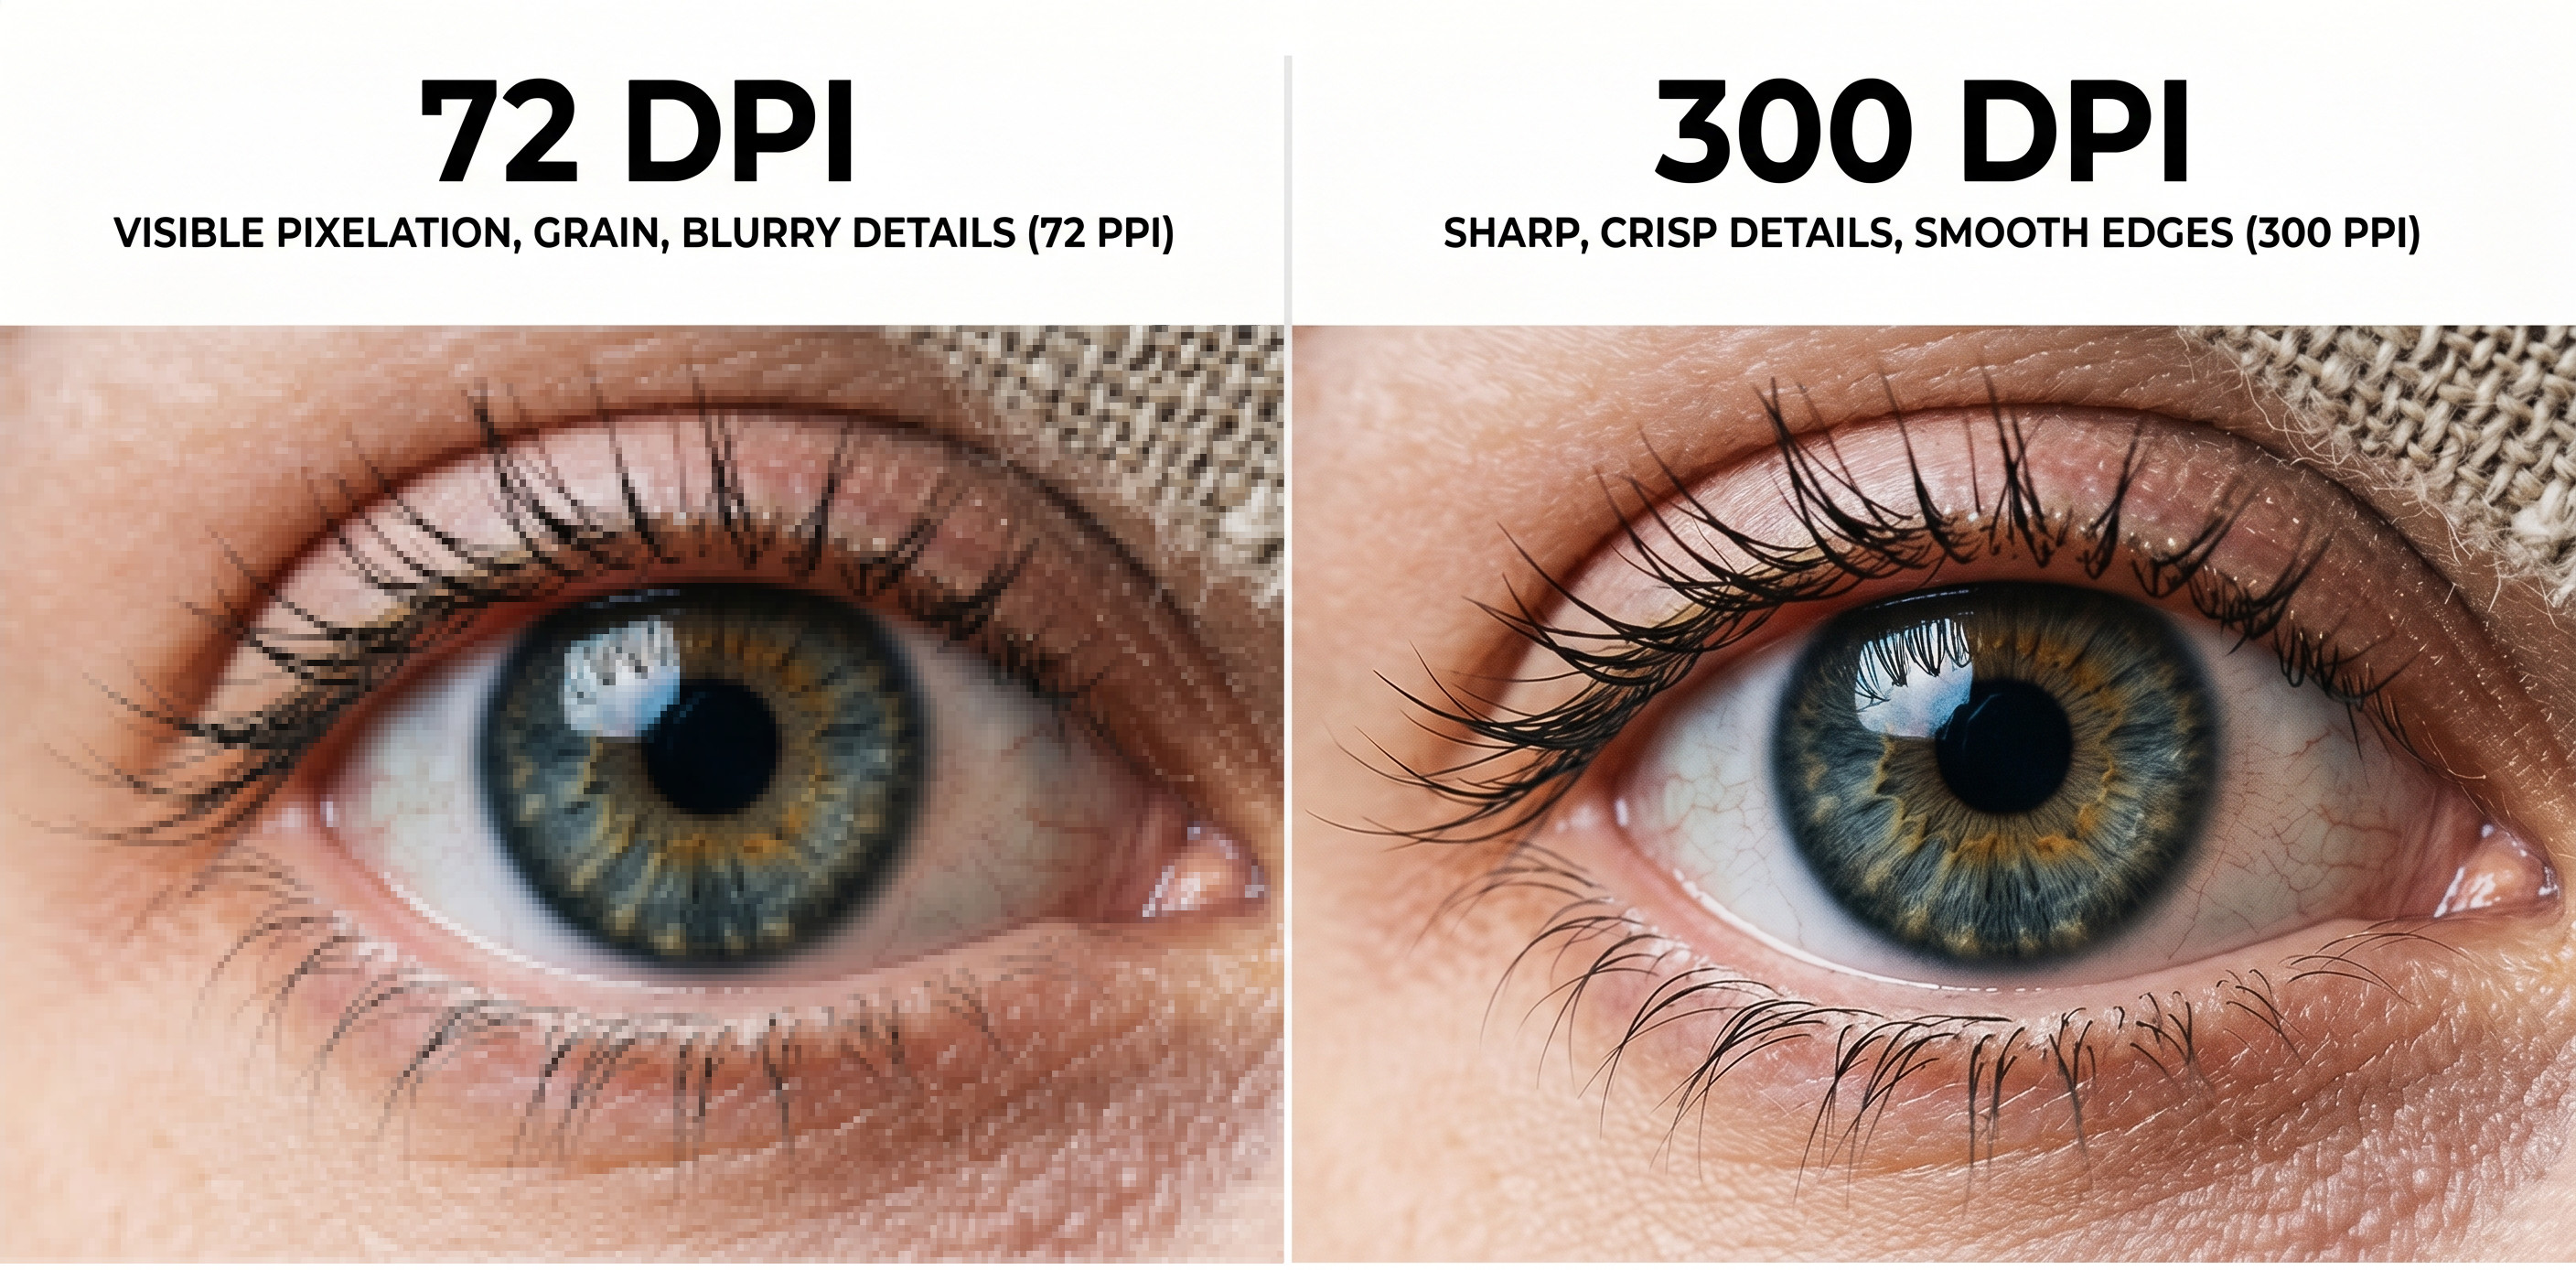
4. Use 300 DPI for All Images
Screen resolution is 72–96 DPI. Print resolution is 300 DPI minimum.
An image that looks sharp on your monitor may print blurry or pixelated if it was downloaded from the web or resized incorrectly.
How to check:
- In Photoshop: Image → Image Size → check Resolution (must be 300 Dpi at print size)
- In Word/InDesign: Avoid enlarging images beyond their original size
 A practical rule: If an image file is smaller than 200KB, it is almost certainly too low resolution for print. Cover images should ideally be 1MB or more.
5. Embed All Fonts
If your PDF uses a font that isn't embedded, our computer will substitute a different font. Your carefully chosen typography will look completely different.
When exporting to PDF, always choose "Embed all fonts."
Most PDF export settings do this automatically, but it's worth verifying — especially if you're using custom or purchased fonts.
Alternatively: Convert all text to outlines/curves before exporting. This turns text into shapes, so no font is needed. The downside is that the file is no longer editable.
6. Check Your Margins (Especially the Gutter)
The gutter is the inner margin — the side closest to the spine of the book.
For a bound book, pages curve slightly toward the spine. If your inner margin is too small, text near the spine will be hard to read or may disappear into the binding.
Recommended minimum gutter margins by page count:
| Pages | Minimum Gutter |
|---|---|
| Up to 150 pages | 15mm |
| 151 – 300 pages | 20mm |
| 301 – 500 pages | 25mm |
| 500+ pages | 30mm |
 | |
| Outer, top, and bottom margins can be 15mm as a safe starting point, adjusted for your design. |
7. Separate Your Cover File
Your interior pages and your cover must be two separate PDF files.
The cover is printed on different paper (usually thicker, with lamination or UV coating) and goes through a different process. Mixing the cover into the interior PDF creates problems during production.
Cover PDF should include:
- Front cover
- Spine (width depends on page count and paper thickness — we calculate this for you)
- Back cover
All in one flat, single-page PDF, laid out left to right: Back → Spine → Front.
 If you're unsure about spine width, send us your interior PDF first and we'll calculate it and share a cover template with the exact dimensions.
8. Proofread on Paper, Not Screen
This isn't a technical tip — but it's the most important one.
Print a few pages on your home printer before sending to us. Errors that are invisible on screen become obvious on paper. Check:
- Page numbers are correct and consistent
- Chapter headings are formatted uniformly
- No widows or orphans (single words or lines isolated at the top/bottom of a page)
- Images are where you intended
Once your book goes to press, changes are not possible without reprinting.
What Happens When You Send Us Your File
At VST Press, we don't auto-print files. Every file goes through a manual preflight check:
- We verify page size matches your requested book size
- We check image resolution
- We check bleed and margins
- We flag any issues before confirming your quote
If we find problems, we'll tell you exactly what to fix and how. We'd rather delay a day than print a book you're unhappy with.
Quick Checklist Before You Send
Use this before every submission:
- File exported as PDF (not Word or JPG)
- Page size matches the final book size
- 3mm bleed added on all sides
- All images are 300 DPI at print size
- All fonts are embedded
- Gutter margin is appropriate for your page count
- Cover is a separate PDF file
- You've proofread a printed copy
Ready to Print?
If your file is ready — or even if you're not sure — send us a quote request. We'll review your file personally and let you know if anything needs to be fixed before we proceed.
Have a question about your specific file? Email us at info@vstpress.com — we're happy to take a look before you formally submit.


